Golden Crust, Tangy Soul: Dutch Oven Sourdough Magic
It begins with a whisper of flour in a bowl, a swirl of water, and a bit of living culture passed from one day to the next. Baking sourdough bread in a Dutch oven is more than a method—it’s a meditation. The slow rhythm of stretch and fold, the hush of fermentation, and the moment that lid lifts to reveal a golden, blistered dome… it’s quiet joy, made edible.
There’s a kind of magic in creating something so ancient with your own hands. No timers blaring, no rush—just time, heat, and the earthy smell of transformation. One loaf at a time, you bake not just bread, but presence.
“To bake is to harness the warmth of home in your hands.”
Why You’ll Love This Recipe
This Dutch oven sourdough bread recipe is more than a rustic centerpiece—it’s an experience. With just a few ingredients and a bit of patience, you can create a bakery-style loaf right from your kitchen.
- Beginner-friendly, no special skills needed
- Crusty exterior with a chewy, tangy crumb
- No-knead method with minimal hands-on time
- Perfect for weekend baking or gifting
- Uses natural fermentation for deep, rich flavor
“Cooking is love made visible.”
Ingredients: Simple Pantry Staples for Dutch Oven Sourdough
Makes 1 large boule (serves 8–10 slices)
For the Dough
- 500 g bread flour (preferably unbleached)
- 375 g water (filtered or spring water)
- 100 g active sourdough starter (fed and bubbly)
- 10 g fine sea salt
Optional Add-Ins
- 1 tbsp sesame seeds, for topping
- 1 tbsp rolled oats, for added texture
- 1 tsp olive oil, for greasing the bowl (optional)
Equipment Needed
- 4 to 6-quart Dutch oven with lid (cast iron is ideal)
- Large mixing bowl
- Kitchen scale (for accuracy)
- Silicone or wooden spatula
- Clean kitchen towel or dough-proofing basket
- Sharp razor or lame for scoring
- Parchment paper
Step-by-Step Guide to Perfect Dutch Oven Sourdough Bread
Step 1: Mix the Dough
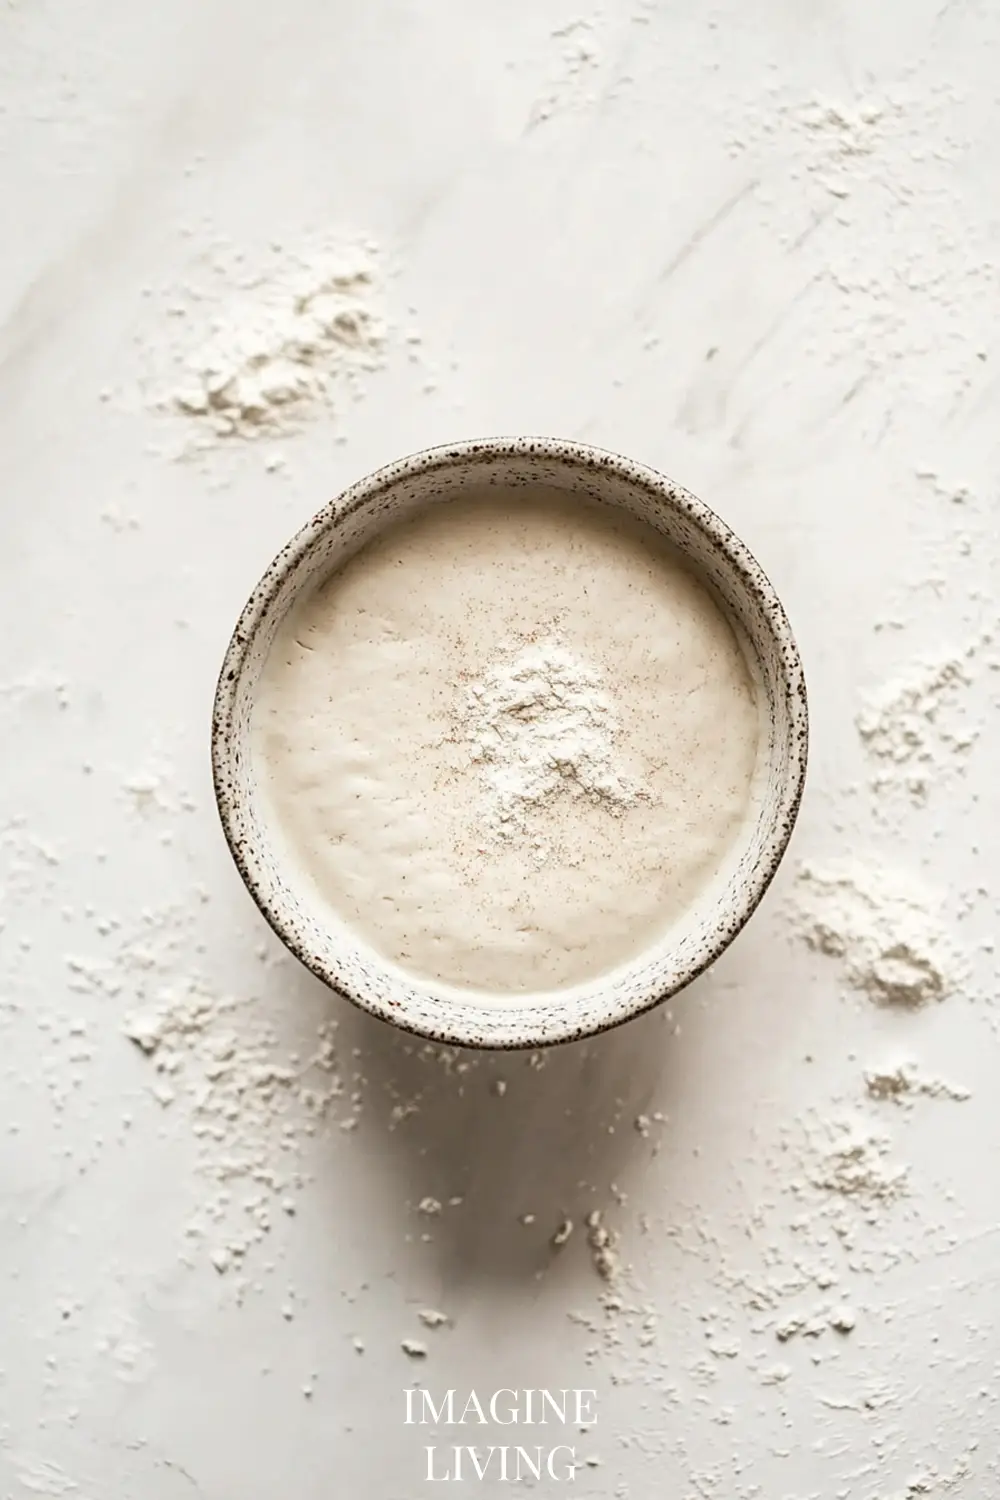
In a large mixing bowl, combine 500 g of bread flour and 375 g of water. Stir until no dry flour remains. Cover and let it rest for 1 hour (this is the autolyse phase).
Tip:
Use your hands to mix—the tactile feel helps you gauge hydration.
Step 2: Add Starter and Salt
Add 100 g of active sourdough starter and 10 g of sea salt to the dough. Mix thoroughly until everything is fully incorporated.
Tip:
Wet your hands to prevent sticking during mixing.
Step 3: Bulk Fermentation and Stretch & Folds
Cover the bowl and let the dough rest at room temperature (ideally 72–75°F) for 4–5 hours. During the first 2 hours, perform 3–4 stretch-and-folds every 30 minutes.
Tip:
Imagine the dough gaining strength with each gentle pull—resistance means gluten is developing.
Step 4: Pre-Shape and Bench Rest
Turn the dough onto a lightly floured surface. Pre-shape it into a round and let it rest uncovered for 20 minutes.
Tip:
This brief rest allows the gluten to relax, making shaping easier later.
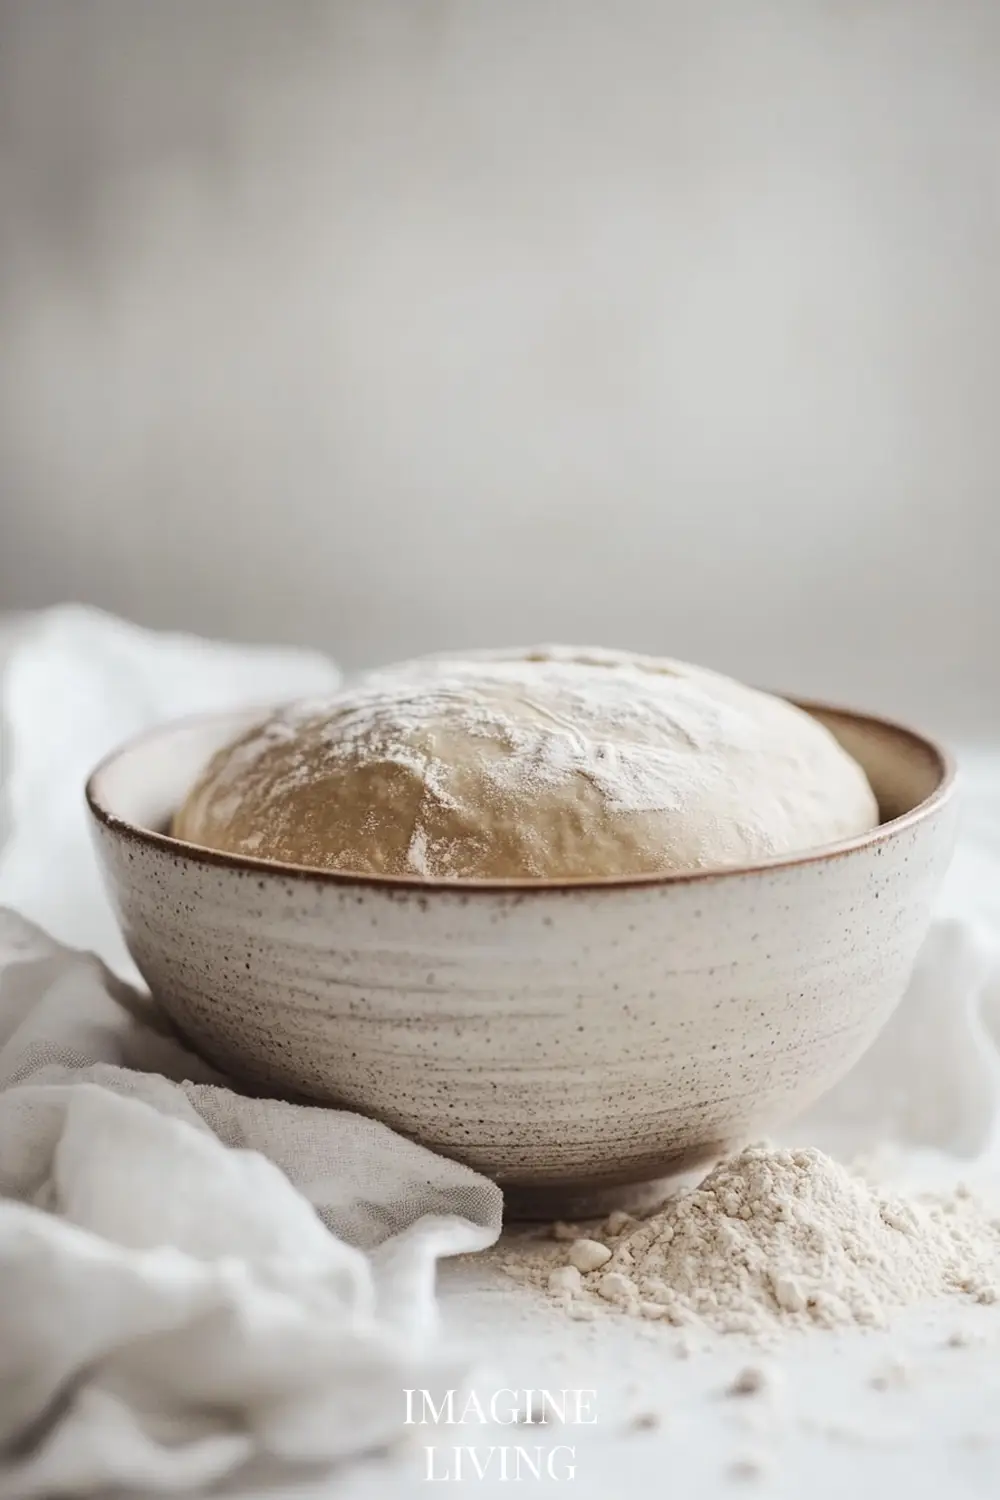
Step 5: Final Shape and Cold Proof
Shape the dough into a tight boule and place it seam-side up in a floured proofing basket or bowl lined with a towel. Cover and refrigerate for 12–18 hours.
Tip:
Long cold fermentation deepens the sour flavor and improves crust color.
Step 6: Preheat the Oven and Dutch Oven
Place your Dutch oven (with lid on) inside the oven and preheat to 500°F (260°C) for 45 minutes.
Tip:
A fully preheated Dutch oven gives that gorgeous oven spring.
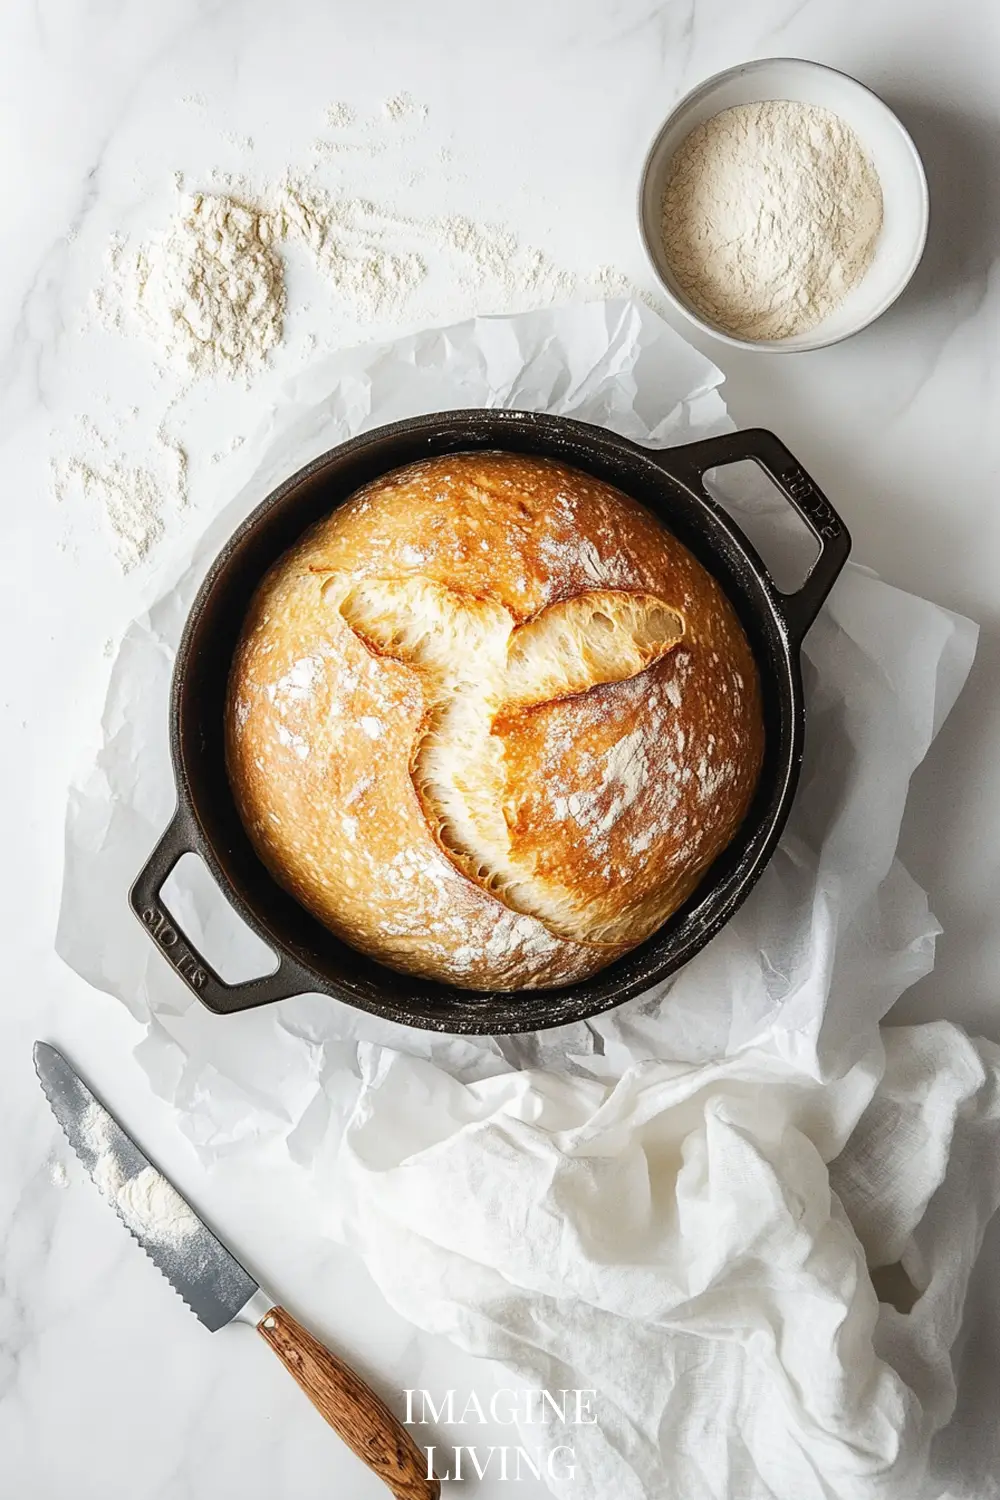
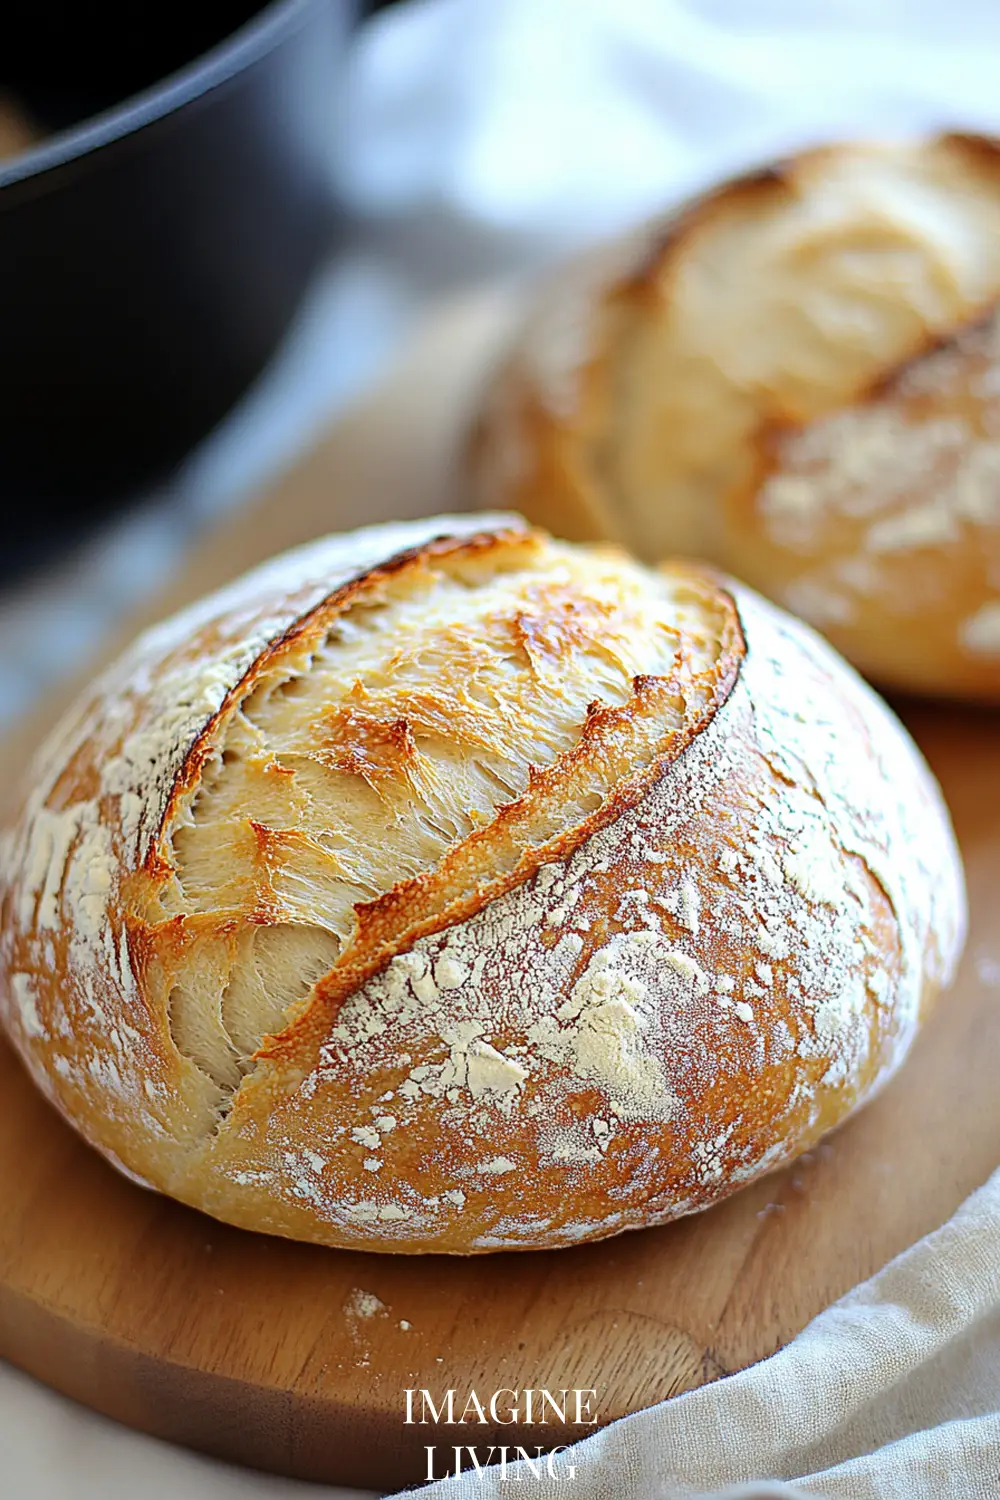
Step 7: Score and Bake
Carefully remove the Dutch oven. Turn the dough out onto parchment paper, score the top with a razor or lame, and place it in the pot. Cover and bake for 20 minutes. Remove the lid and bake for an additional 20–25 minutes until deep golden brown.
Tip:
For an extra blistered crust, mist the dough lightly with water just before covering.
Step 8: Cool Before Slicing
Remove bread and let it cool on a wire rack for at least 1 hour before slicing.
Tip:
Cooling sets the crumb and enhances flavor—resist the urge to cut too soon!
“Good bread is the most fundamentally satisfying of all foods; and good bread with fresh butter, the greatest of feasts.” – James Beard
This video is here as an extra source of inspiration! While it may not match this exact recipe, it offers helpful techniques, ideas, or visual guidance to enhance your cooking experience.
Time Needed
Let’s break down the time commitment for this artisan loaf:
- Prep Time: 1 hour (includes mixing and stretch/folds)
- Fermentation Time: 12–18 hours (overnight cold proof)
- Bake Time: 45 minutes
- Total Time: About 18–20 hours (mostly hands-off)
Perfect for a weekend project—start Saturday afternoon, bake Sunday morning.

- Product size: EDGING CASTING enameled cast iron bread oven, Item width side to side, item width unitItem Width Unit 10.3…
- Design characteristics: It’s very specially designed for bread baking, cast iron can provides even heat, the dome lid pr…
- Material characteristics: Made of cast iron, glossy enamel exterior, and provides nice adhesion, with stable performance…
This post contains affiliate links. If you purchase through these links, we may earn a small commission at no extra cost to you. As an Amazon Associate, we earn from qualifying purchases. Thank you for your support!
Pro Tips for Dutch Oven Sourdough Success
- Always use an active, bubbly starter for best rise.
- Filtered water keeps unwanted minerals from affecting fermentation.
- Use a digital thermometer to check your oven’s true temperature.
- Want extra tang? Let the shaped dough proof a bit longer in the fridge.
- A rice-floured towel prevents sticking in your proofing basket.
- Avoid over-proofing—dough should spring back slowly when poked.
- Practice your scoring—confident slashes lead to prettier loaves.
- If using parchment paper, trim excess to prevent it from burning.
- Open a window during baking—your kitchen will smell like a French boulangerie.
- Keep a sourdough journal—it helps you track what worked and what to tweak.
“Imagine the aroma of fresh crust crackling under your fingers—it’s your reward for patience.” – Me
Creative Variations: Make Your Sourdough Uniquely Yours
Sourdough is a canvas, and your ingredients are the paint. Try one of these variations to bring new flavors and textures to life.
Olive and Rosemary Loaf
Fold in chopped kalamata olives and fresh rosemary during the second stretch-and-fold.
Tip:
Drain olives well to avoid excess moisture in the dough.
Seeded Multigrain
Add sunflower seeds, flaxseed, and oats for crunch and nutrition.
Tip:
Soak seeds in water for 2 hours to prevent them from drawing moisture from the dough.
Cinnamon Raisin Sourdough
Fold in cinnamon and soaked raisins after the autolyse for a subtly sweet loaf.
Tip:
Avoid adding sugar directly—it can slow fermentation.
Cheddar and Jalapeño
Add diced sharp cheddar and sliced pickled jalapeños for a bold, savory spin.
Tip:
Use firm cheese to prevent excessive melting.
Herb and Garlic Infusion
Mix in roasted garlic cloves and chopped thyme or sage.
Tip:
Roast garlic ahead to mellow the flavor and avoid bitterness.
Cranberry Walnut
Perfect for the holidays—tart cranberries meet rich, nutty walnuts.
Tip:
Toast walnuts for a deeper, more aromatic finish.
Beer and Rye Blend
Substitute part of the water with dark beer and replace 100 g flour with rye.
Tip:
Use stout or porter for a malty, robust flavor.
“Creativity is like leaven—it only takes a little to raise the whole loaf.”
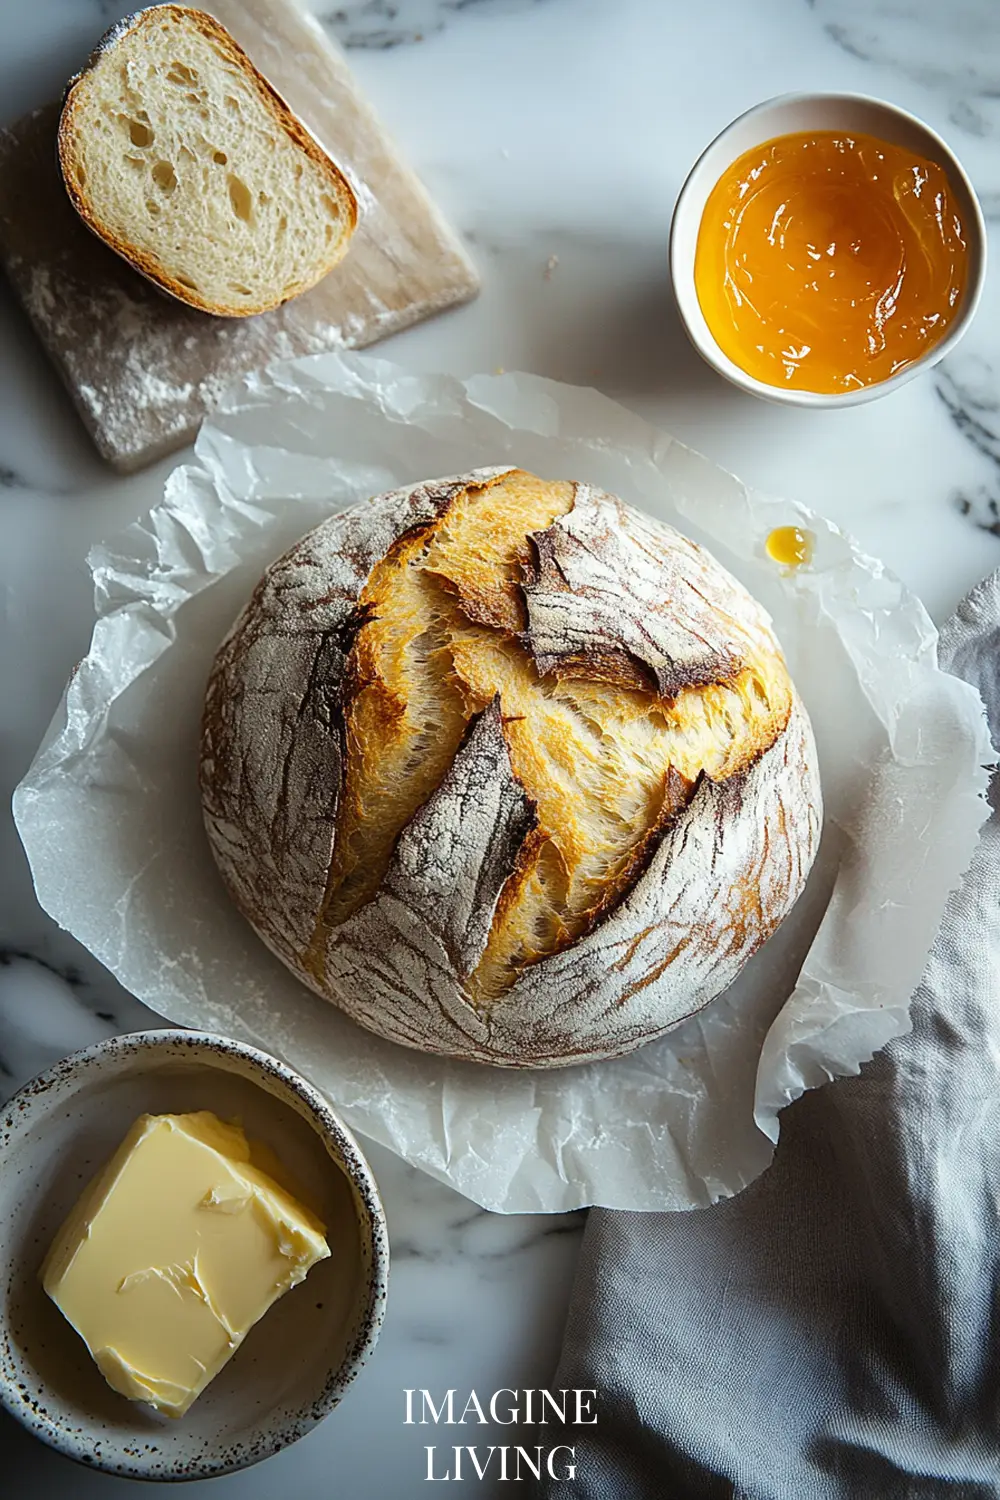
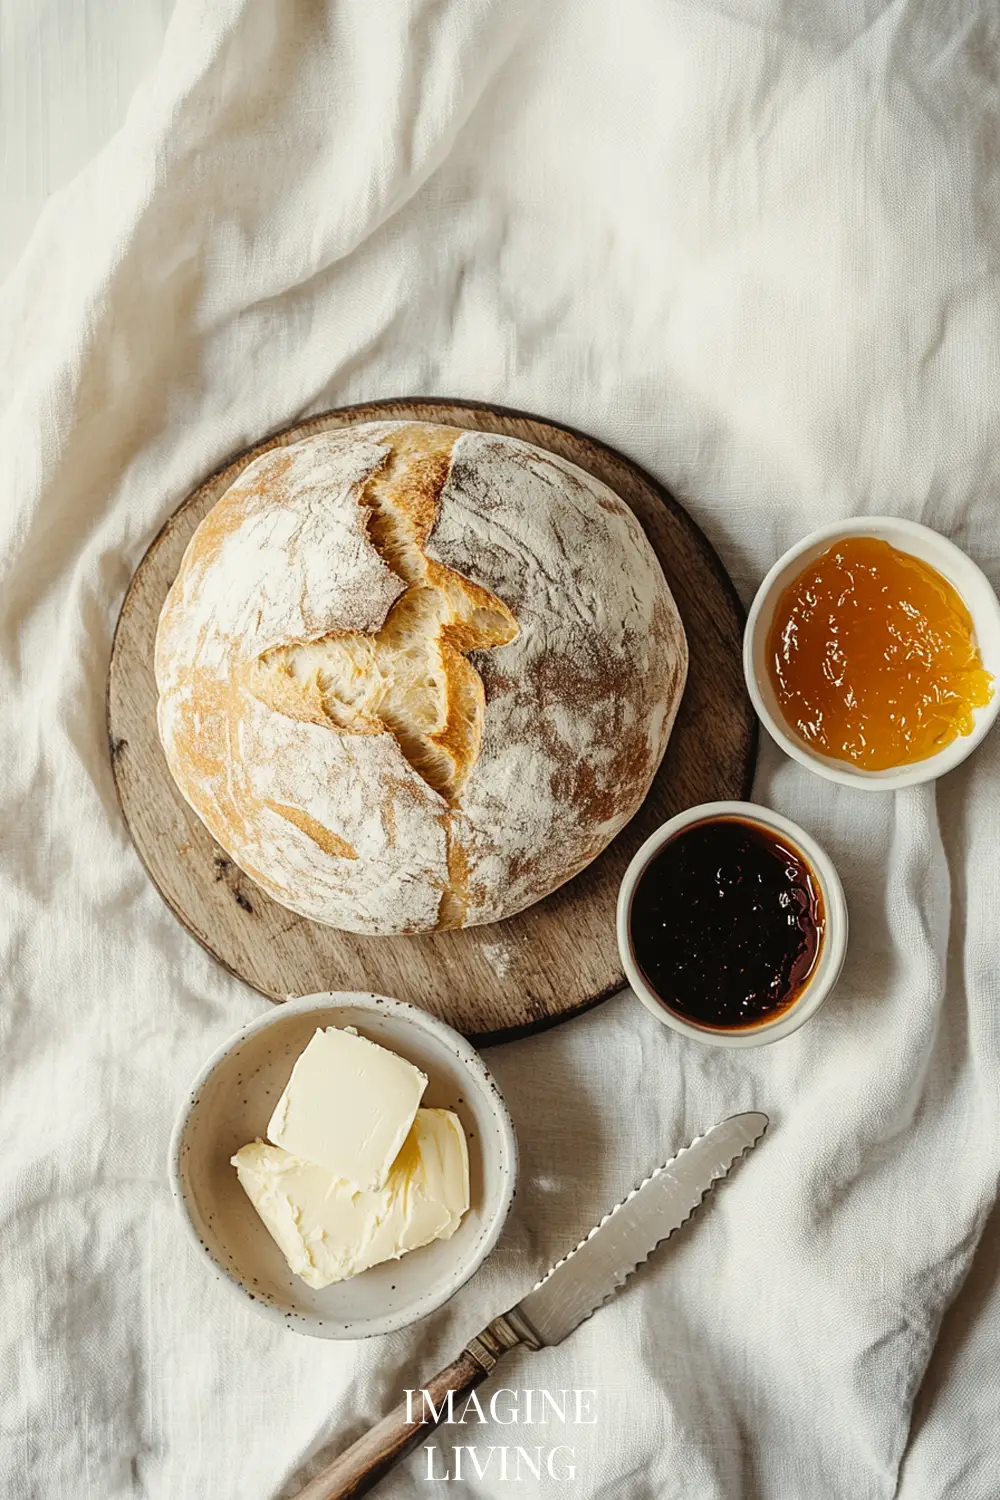
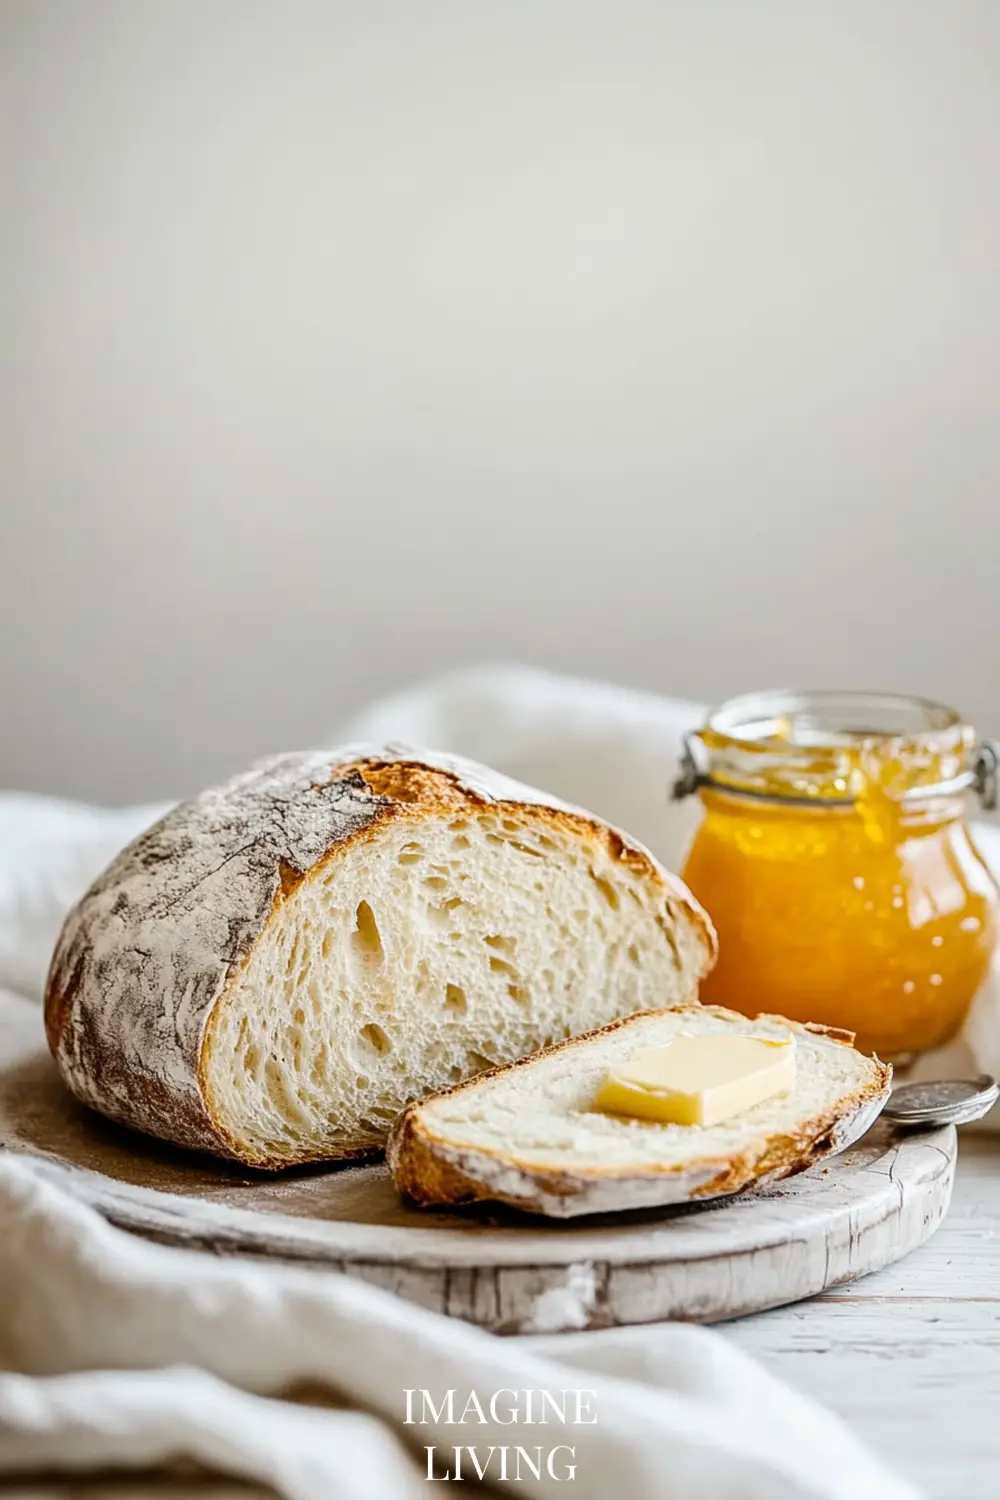
Serving Suggestions
Freshly baked sourdough is a showstopper all on its own, but here’s how to round out your table with simple yet delicious pairings:
- Serve warm with cultured butter and sea salt
- Pair with tomato basil soup or creamy butternut squash soup
- Use as the base for a rustic bruschetta or tartine
- Slice and toast for avocado toast or breakfast eggs
- Enjoy with a soft cheese board and honeycomb
Storage and Reheating
Keep your sourdough loaf fresh and flavorful with these tips:
- Store in a paper bag or wrapped in a clean tea towel at room temperature for up to 3 days
- Avoid plastic bags—they trap moisture and soften the crust
- Freeze leftover slices in a zip-top bag for up to 3 months
- To reheat, toast slices directly or warm a whole loaf in a 350°F oven for 10–15 minutes
Tip:
Revive a slightly stale loaf by spritzing with water and baking at 375°F for 5–7 minutes.
Common Mistakes to Avoid
Perfecting sourdough takes practice. Here are a few common pitfalls and how to steer clear:
Underproofing the Dough
Rushing the fermentation process results in dense, gummy bread.
Tip:
Let the dough rise until it has visibly expanded and springs back slowly when poked.
Overproofing During Cold Ferment
Too long in the fridge can exhaust the dough, causing it to collapse in the oven.
Tip:
Keep cold proof under 18 hours unless using a stiffer starter.
Inaccurate Measurements
Guesswork leads to inconsistent results.
Tip:
Use a digital kitchen scale—baking is science, and precision matters.
Skipping the Preheat
Placing dough into a cold Dutch oven won’t yield that coveted oven spring.
Tip:
Preheat your Dutch oven for a full 45 minutes to mimic bakery conditions.
Slicing Too Soon
Cutting into a hot loaf ruins the structure and texture.
Tip:
Wait at least an hour to let steam settle and crumb set properly.
Using Inactive Starter
Flat bread often means your starter wasn’t ready.
Tip:
Feed your starter 4–6 hours before baking—it should be bubbly and pass the float test.
FAQs
Can I Make This Without a Dutch Oven?
Yes, but you’ll need to create steam in the oven using a baking stone and a tray of hot water.
Tip:
A covered pot retains steam naturally, so results may vary without one.
How Do I Know My Starter Is Active Enough?
It should double in volume within 4–6 hours after feeding and pass the float test.
Tip:
Drop a spoonful into water—if it floats, it’s ready to go.
What’s the Best Flour to Use?
Bread flour gives the best structure and chew. You can mix in whole wheat or rye for added flavor.
Tip:
Start with at least 75% bread flour for your first few loaves.
Can I Use All-Purpose Flour?
You can, but the texture will be slightly softer and less chewy.
Tip:
Use slightly less water if using all-purpose flour.
How Do I Make It More or Less Sour?
Longer fermentation or colder temps increase sourness. Shorter proofing yields a milder flavor.
Tip:
Experiment with timing and starter ratios to dial in your perfect tang.
Why Didn’t My Bread Rise?
Possible reasons: underactive starter, cold dough, or underproofing.
Tip:
Troubleshoot one variable at a time to find the root cause.
Is It Okay If My Dough Feels Sticky?
Yes! High hydration dough feels sticky but bakes into an open, airy crumb.
Tip:
Use wet hands during handling instead of adding more flour.
The Soulful Simplicity of Sourdough
Sourdough bread baked in a Dutch oven is more than a rustic recipe—it’s a return to slowness, intention, and the magic of transformation. Each loaf you bake tells a story of wild yeast, human touch, and the alchemy of heat and time. And once you’ve tasted that crackly crust and complex crumb, store-bought bread will never quite compare.
Bake it once, and you’ll understand why this bread becomes a ritual for so many home bakers.
Dutch Oven Sourdough Bread
Equipment
- Dutch oven (4–6 qt, with lid)
- Large mixing bowl
- Kitchen scale
- Spatula or wooden spoon
- Clean kitchen towel or proofing basket
- Sharp razor or lame
- Parchment paper
Ingredients
For the Dough
- 500 g bread flour unbleached preferred
- 375 g water filtered
- 100 g active sourdough starter fed and bubbly
- 10 g fine sea salt
Optional Add-Ins
- 1 tbsp sesame seeds for topping
- 1 tbsp rolled oats for texture
- 1 tsp olive oil for greasing the bowl (optional)
Instructions
Mix the Dough
- Combine flour and water in a bowl. Mix until just combined. Rest 1 hour (autolyse).
Add Starter and Salt
- Mix in the starter and salt until fully incorporated. Use wet hands to prevent sticking.
Bulk Fermentation + Stretch & Folds
- Let dough rise at room temp 4–5 hours. Perform 3–4 stretch-and-folds during the first 2 hours, every 30 minutes.
Pre-Shape + Bench Rest
- Turn dough onto a floured surface. Pre-shape into a round. Rest uncovered for 20 minutes.
Final Shape + Cold Proof
- Shape into a tight boule. Place seam-side up in a floured towel or proofing basket. Cover and refrigerate for 12–18 hours.
Preheat Oven + Dutch Oven
- Preheat oven and Dutch oven to 500°F (260°C) for 45 minutes.
Score + Bake
- Turn dough onto parchment, score top, and transfer to Dutch oven. Bake covered for 20 minutes, uncovered for 20–25 minutes.
Cool
- Cool completely on wire rack for at least 1 hour before slicing.
Notes
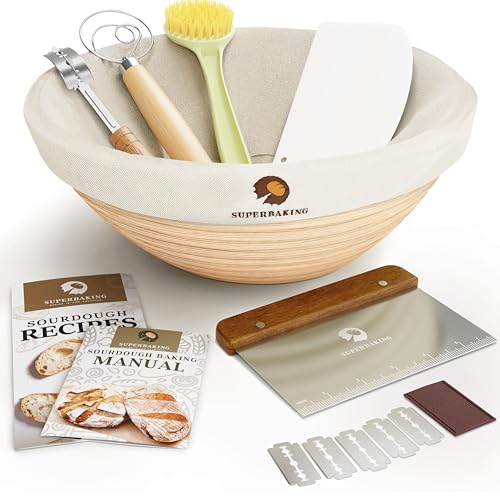
- PROOF, BAKE, SHARE your Sourdough Bread: Create delicious sourdough loaves with The Superbaking Banneton Kit. Enjoy the …
- GIFT THE LOVE OF BAKING: Featuring a high quality A-grade rattan banneton and a complete toolkit, this set is the perfec…
- 9 TOOLS FOR SOURDOUGH BREAD MAKING : The Superbaking bread baking kit includes everything from a proofing basket to broc…
This post contains affiliate links. If you purchase through these links, we may earn a small commission at no extra cost to you. As an Amazon Associate, we earn from qualifying purchases. Thank you for your support!